
June 23, 2010
Launch delay
On account of failure to account for adequate paint drying times, and excessive daytime temperatures.
But we're GO for tomorrow afternoon.
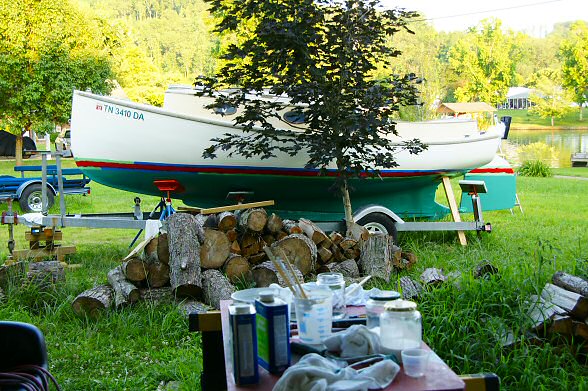
It turns out that the five dollar stand (2 x 4 with a square of plywood screwed on the end) works almost as swell as the hundred dollar stands. I'll give the red stripe a second coat in the morning, and let it dry until afternoon. While the paint dries, I'll remove the jacks and return the trailer to its level position, add some air to the tires, bolt on the winch (just in case), hang the motor, find some fresh gas, install the tiller (mucho thanks to Sweet Cheeks for applying about six coats of some kind of varnish to the ancient thing), find the anchor and load it aboard along with sundry other accoutrements, and bring the truck around for to play tractor. The launch vector is just the other side of that house in the upper right corner.
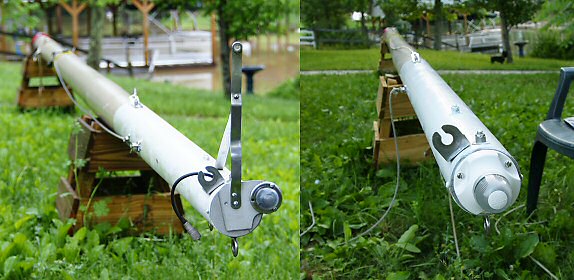
Meanwhile… part of the long drawn out process was redoing the top of the mast. The tiny incandescent light barely threw enough light to be seen from below, and the whole ensemble was really just jammed together, antenna wire sticking out, light wires sticking out, etc. The bracket pointing straight up held the wind indicator, and the smaller bracket held the marine radio antenna. In these waters, I don't need the permanent radio installation, as my smaller radio works fine, and I'm able to fit the wind indicator to the antenna bracket, so off with the ugly bracket, and away with the radio antenna wire. I threw a new wire all the way down the mast for the new light, which is a Hella LED, drawing less than 2 watts, and is supposed to be visible for more than two nautical miles, which exceeds requirements AND necessity, too, but will last for years and years. So, a much cleaner arrangement, with no exposed wires, and quite a few holes plugged with metal alloy. Sweet Cheeks repainted the upper white portion (she varnished the six mast hoops, too), and the mast is pretty much good to go. I have some new blocks for the halyards to run through, but they'll go on in nothing flat.
Oops. I still need to drill holes to mount the cheek block for the topping lift, replacing the broken block (barely visible in the 'before' picture) which was slightly smaller. Piece of cake.