
November 25, 2017
Revelations from The Book of Tools
… and it smited him as with an hammer…
There I was, reading from the neglected stack of Fine Woodworking magazines, deep into the weeds on splined picture frame miters (about the only thing in years of subscription remotely within my capabilities, having long been in my, ahem, repertoire), when out from the depths leapt into my eyeballs the picture of the tool…
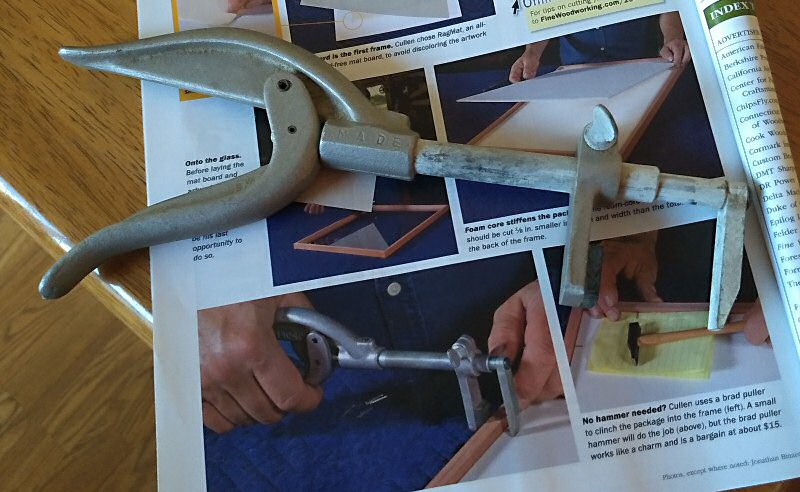
Whaaaaaaaaaaaaaaa?!!!! I’ve had that tool at the bottom of various tool boxes for decades, never knowing what it was, but liking it immensely for its self-evident utility. And there it’s been all this time, a tool I could have made enormous use of in all the frames I ever built, but instead used a flat bladed screw driver at great danger to myself, my picture frames, and sundry art products. I am blowed away.
I’m sure I acquired that thing from my dad as he relinquished bits and pieces over the years, without knowing what it was or having its function described to me. Holey moley.
I must test it out!
October 1, 2017
I love bead board
Even when it goes plain side out…
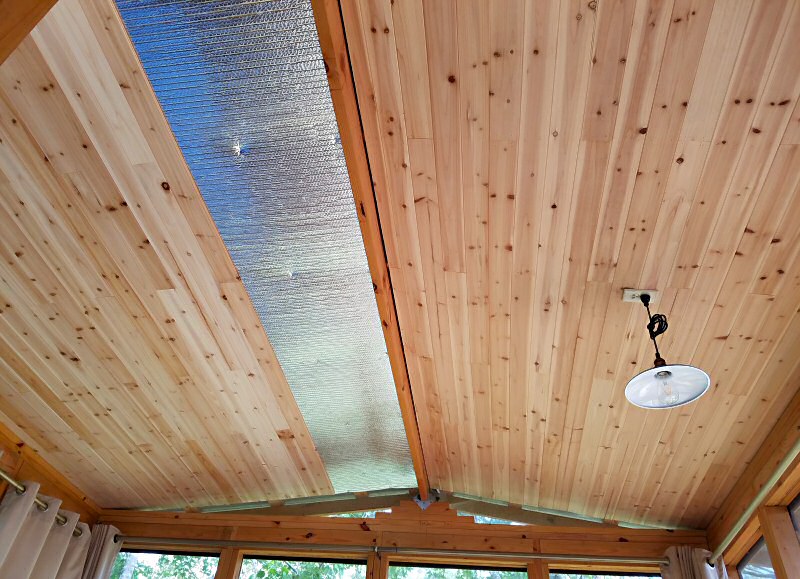
The smaller right half went up at the end of May, but I just got around to the left half yesterday and today. Done. Whew. And boy, are my arms tired.
The foil lined bubble wrap radiant barrier will keep some of the summer sun from blasting through. And the rain noise (louder than you might think) should be… uh… reducked!
The very cheap lamp fixture had to be rewired at both ends, but the LED bulb is lervely. The socket is switched at both the outer and inner doors, which had to be pre-planned more than three years ago, probably my greatest feat of foresight ever.
That’s cedar, by the way, which the stink bugs don’t seem to care about. I have to make some quarter round to thwart their last point of ingress.
Next: take all the various cedar scraps and artfully nail them to the unfinished wall that will be the back of the two closets out there.
Even then, the deck project will not quite be done. Oh no.
March 28, 2017
Plumb Stupid
More than anything in the world, Sweet Cheeks wanted to be rid of that old, moldy DIY (not my own self) shower installation and have a shiny new unit in its place, and lo, thus did it come to pass.
Having such critical infrastructure out of commission for an extended period was out of the question, so I hired a guy, and he did a swell job. In the course of removing the tiled, slab base of the old thing, however, he broke some of the CPVC drain piping under the house. Not a problem, really, just an unavoidable side effect of such things. In fact, it was probably a good thing the way it happened. And, the new drain didn’t exactly line up with the old pipes, anyway.
It became my task to fix the drain lines, since it was something I could do while other work proceeded, and because I am familiar with the lay of the land underneath. And here ’tis…
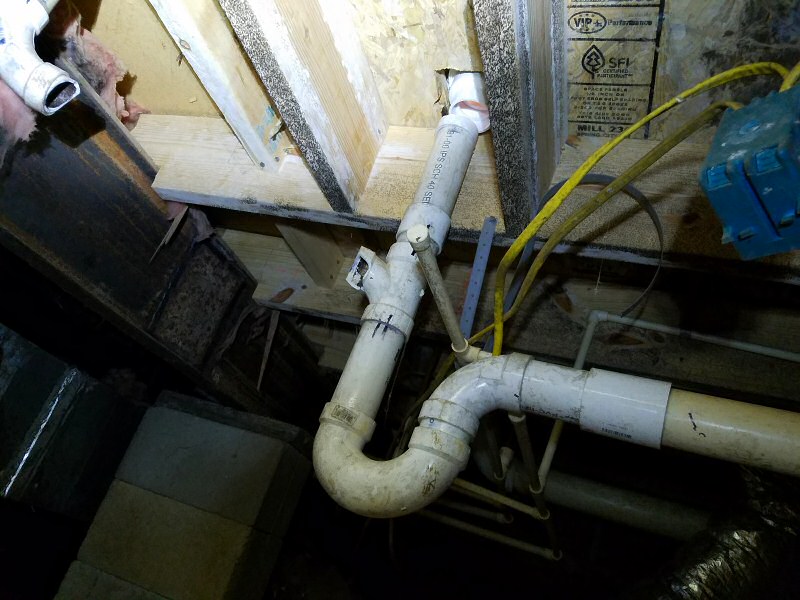
The drain piece from the new shower base is poking through the sub-floor, near the broken top of the drain line assembly. Also broken is what is supposed to be part of the vent stack. The elbow in the upper left corner leads to a vertical pipe that runs up the wall behind the shower and then through the roof. Most in home plumbing has several of those, and they can be connected together, usually in an attic or roof space, to minimize holes through the roof. Such vents facilitate the free flow of water through extended runs of pipe where water may not flow without adequate air coming in behind it.
The problem with the vent spur above is that it is (or was) connected to the wrong side of the P-trap. It is utterly useless there. Worthless. A complete waste of material, effort, and a hole in the roof.
In fact, it’s worse than useless. Spiders, ants, or other ne’erdowells, could crawl from the roof, down the pipe, and up into the shower without having to pass a water barrier like those in the P-traps.
Unbelievable.
I fixed it, though I’m not entirely thrilled with my own work, and may go under again to fix it some more. That last glue joint just didn’t fill me with confidence.
But the new shower is fab.
Happy Birthday, honey.
ps. Notice the free swinging electrical box with the yellow wires in and out. Just hanging there. The guy who did that (and probably the plumbing) is, or was, a professional licensed electrician.
February 27, 2017
Too Frou Frou?
I’ve been laying in new wood earlier than usual, but I found a couple new sources and thought I better jump on them. I’m mostly set for next Winter already, a record.
Then, with more regular ricks in the yard than usual, I thought I better make mo regular covers for them.
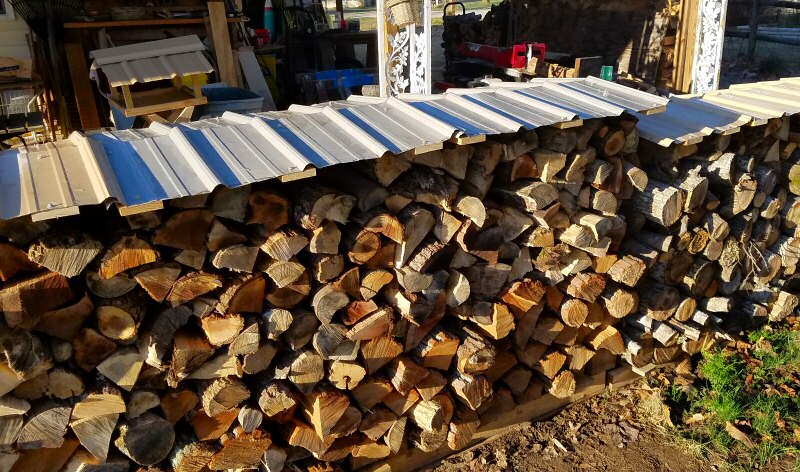
With a nice supply of left over roofing metal stashed under the boat trailer for the last several years, I ginned up that bunch of peaked roof things in the picture. Two by four 35 1/2 inches long. Three one by fours 28 inches long, the outer ones indented and the middle one offset on the two by four by about half an inch. One fourteen inch piece of roof metal, and one fifteen and a half inch piece for each unit. Six wood screws and eight roofing metal screws. I’ve made eleven of them, so far.
They are modular, interlocking, not quite self-replicating, very possibly wind resistant, and they match the house and barn and well pump, but is it all just too much House & Garden or not?
The metal roofed thing in the background is a bird feeder that didn’t make it out this Winter.
October 29, 2015
Sky Porch
It’s taken me most of the year to get this far. I work slow. We call it The Tree House.
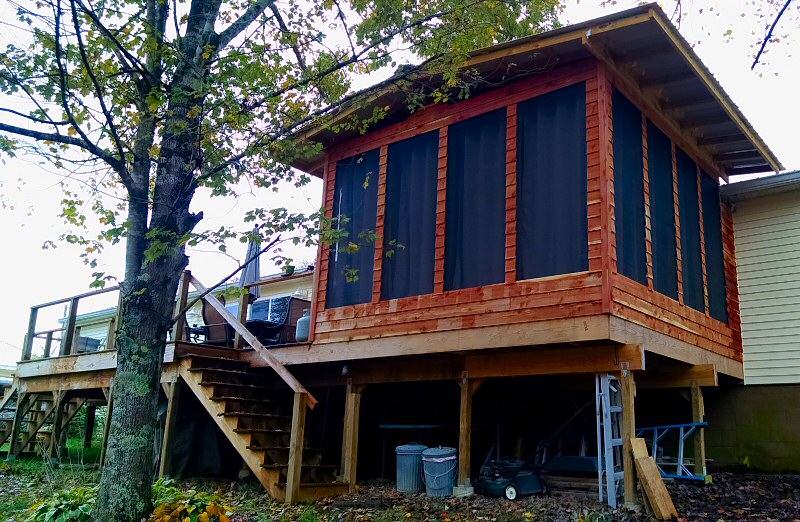
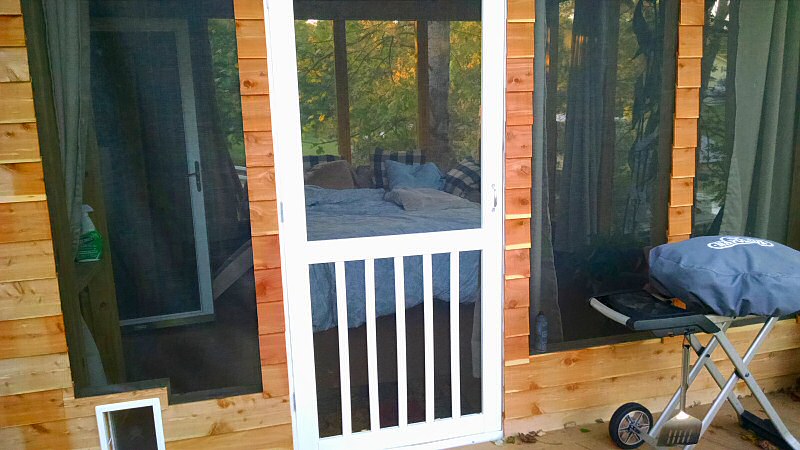
Lots more work, still, of course. Electrical. Ceiling. Closets. Accoutrements. A really BIG TEEVEE with SERIOUS SURROUND SOUND, yep. (nope) Maybe a digital aquarium. Or a bust of Donald Clinton. whoops.
September 16, 2015
Carport Porch Pizza
For the first time in a year and a half I’ve parked the pick up truck back in the shade of the carport. The big deck/porch/rear facade remodel has finally entered final phases, and other spaces are sufficient to hold lumbers and tools for what’s left. I turned the corner today when the last of the forty six pieces of tongue and groove southern pine were chopped, primed, and carried out of the car port and stapled down as the new back porch floor. Weirdly, all that pine was one of the earlier arrivals to the car port, owing to my wildly optimistic sense of how the project would progress. The wood is surely acclimated, now.
Meanwhile, the pizza-a-day thing is still rolling along…


Both those are inspired by Jim Lahey, differing from his versions mainly in cheese selection (Pecorino cheese is an hour drive from here), but the dough is what makes the things. The bottom one has a Bechamel base sauce (made with heavy cream, no less, because that’s what I had), minimal cheeses, and a few sprigs of homegrown Rosemary. The Spinachy pizza has a little sliced garlic, minimal cheeses, a ton of spinach, some sea salt, and big drizzles of olive oil.
Sweet Cheeks has been perplexed, lately. She was ecstatic about both pizzas above. Exclaiming “perfect”, etc.
But when I added a somewhat thin Bechamel under the Spinach pizza tonight, and forgot (I forgot) the Parmesan altogether, she said it was the best pizza she’s ever eaten in her whole life. How can I believe anything she ever says again? And what’s she going to say when I remember the flaked Parmesan next time?
Anyway, I be cooking eight different pizzas for maybe ten people in a couple days. Wish me luck.
And that the deck doesn’t collapse.
August 26, 2015
Cascade!
This is like, A Fly Went By, or maybe a “For want of a shoe the horse was lost” kind of thing.
Sometime last Winter, probably, a very small, tiny, tinier than a pinhole, leak sprang forth from a compression joint in the cold water supply to his and her honor’s main bathroom. Indirectly, it was related to Vitruvius of long ago, wherein a leak in the same kind of obsolete water conduit brought the kitchen to its knees.
The new leak sprayed a very fine mist of water (so fine that it was hard to see) against the underside of the bedroom floor. The particle subfloor, slowly saturated, eventually gave way, announced via two bookcases, double stacked with books and knick knacks, leaning precariously into the room.
The bookcases and their holdings were removed to the spare bedroom. A few baseboards were uninstalled, and the aged carpet was pulled up along the wall, whereupon it became self-evident that it would be unlikely that the carpet could ever be put back in place without looking like shit.
So… we emptied the entire room, pretty much, and started from scratch, rethinking everything that we had had no time to think about when we moved in, in a hurry, seven years ago.
Pictures, and then the various disumbolocutions:
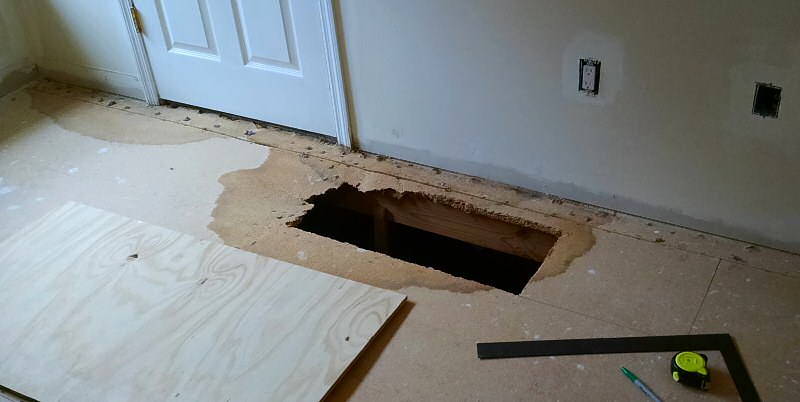
The exploratory hole, but after the plumbing fix, and some painting started.
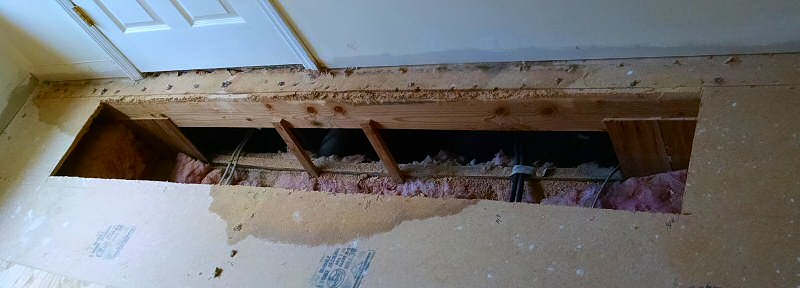
Final cut out, but not cleaned up. The twin black pipes in the hole were the culprits in the mess. I clipped them out of contention and ran a more direct route of the hard plastic stuff.
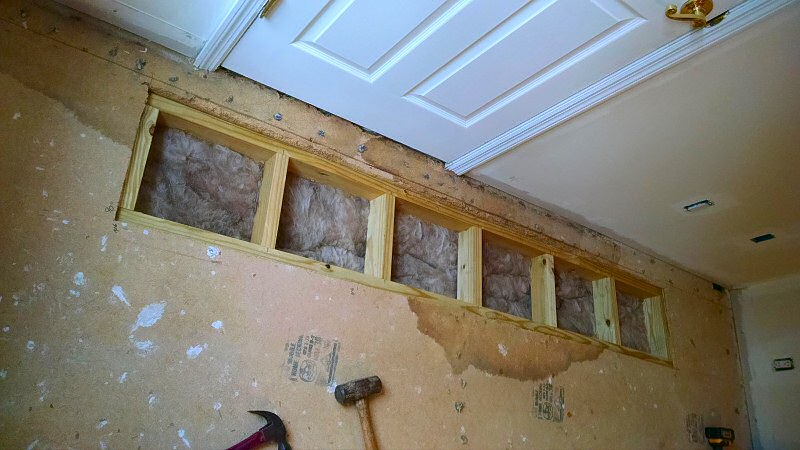
Mad framing and massive insulation left over from other work. That frame extends under the floor on each end and was a nasty tight fit, but I beat it in there.
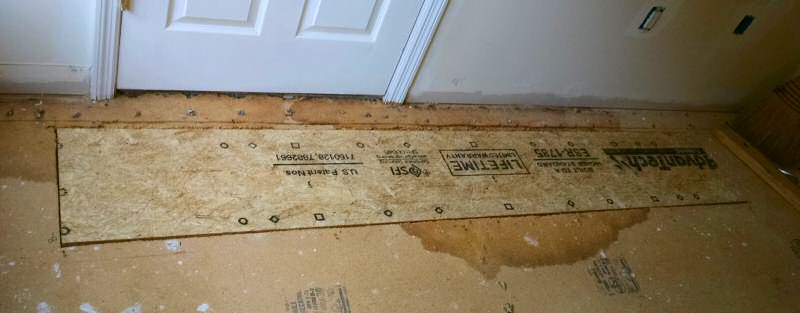
Patched for all time! Whereupon I pulled the rest of the staples and nails, sanded things into rough compliance, and spread a leveling compound/cement around everywhere. Whereupon I seem to have lost relevant pictures until…
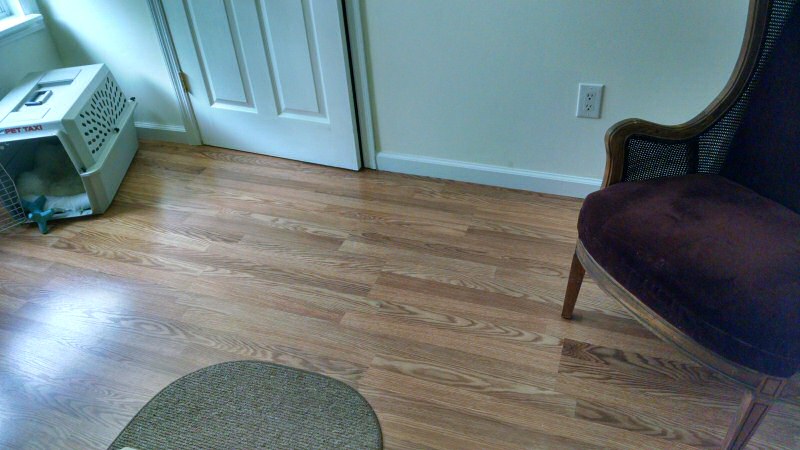
Floor done. I put a 1/4 inch underlayment on top of the subfloor, and the requisite foamy padding under the laminate.
And little baby Jesus bless Sweet Cheeks for all the work she put into this.
….
But the big story is the knock on effects.
Two large bookcases were not moved back into the bedroom. Dressers were rearranged and many contents thereof were… eliminated. Knick knacks were carted off to landfills, or redistributed to other parts of the house, the latter process which led to the discovery of my favorite lampshade, long thought lost. Like almost two decades lost.
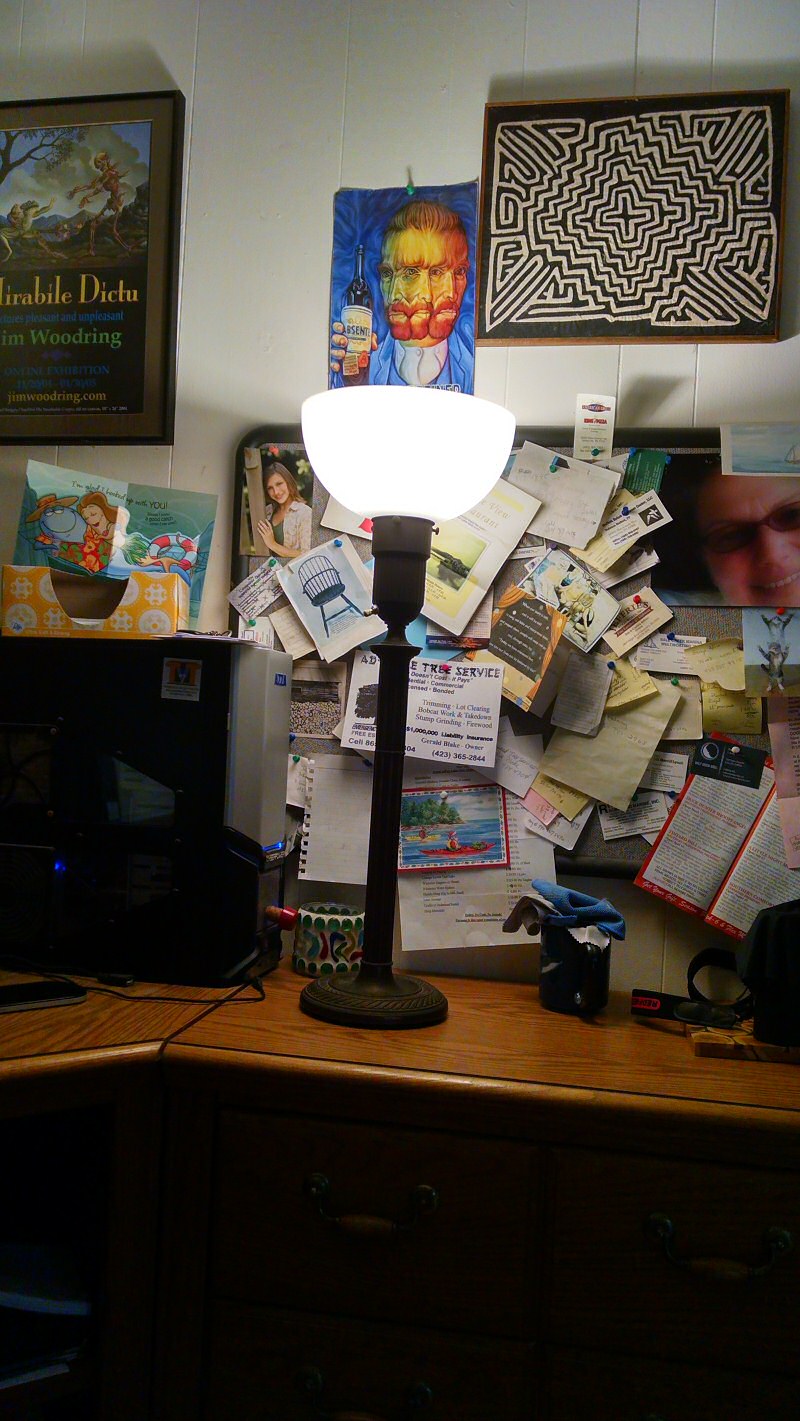
That lamp came with the purchase of my West Virginia house way back in 1987, and is the most beautiful, elegant lamp I’ve ever seen. Seriously. It was originally fitted with a bulb with a giant base that doesn’t seem to be made anymore, and when that bulb burned out, the lamp languished, its base and globe eventually becoming separated during one of several moves over the years. And then, weeks ago, there was the beautiful glass globe, still nestled in newspapers from the 1990s. So, I retrieved the base, stored without hope in the workshop, rewired the whole thing, and once again it’s the bomb on my desk.
Elselike, the utility/junk room has seen major changes, with shelf rearrangements and additions (and things to the dump.) Going in and out under the house for plumbing fixes led me to repair the screen door at one of the access points. There are four new valves under the house, and the hot water gets to the bathroom a couple milliseconds faster than it used to.
And now I’ve got one to two thousand books that I need to dispose of, one way or another. I am reading like mad, trying to decide what to keep, what to burn, how big my reading pile can be for my estimated remaining life span (not all that long, I figure), and wondering not only what existential good will accrue in a reading list I’m unlikely to tout in heaven, but what it means to have left a pile of my personal nostalgia behind when the big enchilada turns me into a grease stain that future generations will have no knowledge of.
But that’s another story.
January 21, 2015
Pi R Squared
Well, the rick of Jan 1 is down to a few armfuls, so I’m calling it at 21 days. There was some cheating from other piles, too.
But new loads are ready…
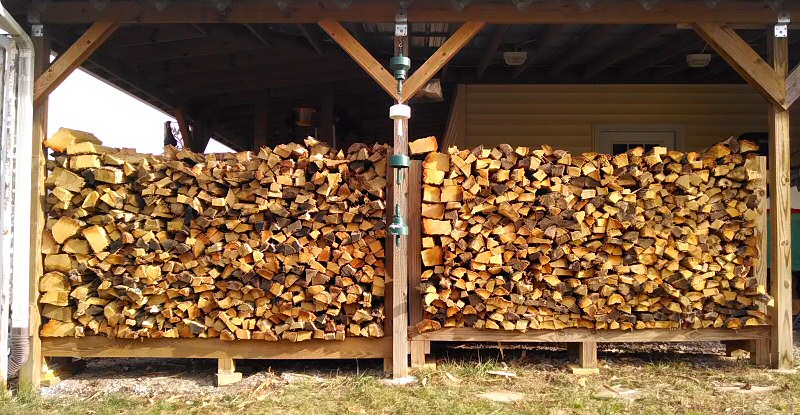
This year I’ve bought about five ricks of wood from a guy over the hill. The ricks he sells are more expensive than other guys sell, for whatever reasons. For me, I’m willing to pay more because he’s a short drive away, he’s reliable (whenever I see wood set out, I can buy it, mostly), his wood is mostly oak, and he’s comfortable to deal with.
The funny thing is, everyone who sells ricks around here splits the wood bigger than I like. And this guy leaves it split the biggest. The logs everyone sells are generally too big to make efficient fires in my wood stove. So, if I have to buy ricks of wood, as opposed to finding, cutting, and splitting my own trees, I have to further split the already split wood I buy. And I don’t mind that. $300 of bought wood probably saves me a $1000 on electricity. And the $300 probably approaches my own cheap hourly wage should I have to go acquire the trees, cut ’em, haul ’em, etc. Not to mention wear and tear on my back.
AND, it turns out, that a rick of this guy’s overly large logs makes far more than a rick of the wood when I get done re-splitting it. A sub-divided log takes up more space than the original log did, no matter how you stack it, unlike mathematically regular stacked cylinders, which take up the same space, no matter how they are sub-divided into smaller cylinders.
So, buying a more expensive rick of large logs might actually be more economical than buying a cheaper rick built of small logs.
That’s my theory, or one of them, and blast on ’til Spring.
January 5, 2015
Winging it
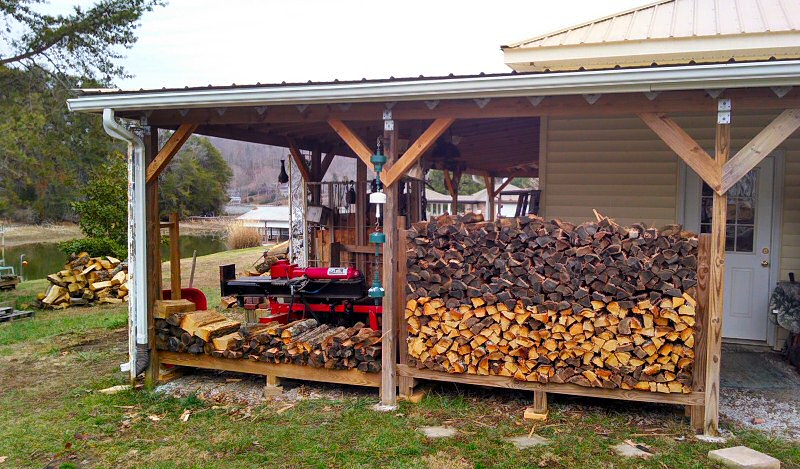
And so it came to pass that I happened to fill up that rick on zackly January 1, 2015. The darker wood is not particularly any more well seasoned than the lighter, though it was acquired earlier and sat in the yard longer than the other. Both came from trees cut about the same time, which was a while ago.
And who can believe it is 2015 already? Yikes. People have been dead longer than I’ve been alive!
The point bean that the agéd skull can remember Jan 1st and parse the progress of word depletion as the nonces slip away without too much untoward stress. The wood meter will finally have some digits taped to its dial.
I must fill the other rick, post hasty, from the pile in the backshot (and a bigger one just out of sight). Winter finally approaches, pray hap.
It’s a whole new arrangement under the overhang corner, with the splitter now sheltered in space previously allotted to stacks of wood. The much blogged about home remodelments which have resulted in greater wood burning efficiency have afforded a remodelment of the wood supply machinery layout and warehousing. And I really like the new layout. The splitter is protected from the elements, yet is situated openly enough that I don’t gas myself running it, AND I can split and stack with an efficiency of ease, the thing I most crave in this world of inefficient woe.
If that rick lasts the month I’ll be amazed, if not astounded, but I’m betting it will be close.
November 17, 2014
Still working…
It’s been four months since my one and only deck/back-of-the-house remodel project post.
Still working at it.
With most of the deck done, the old back wall:
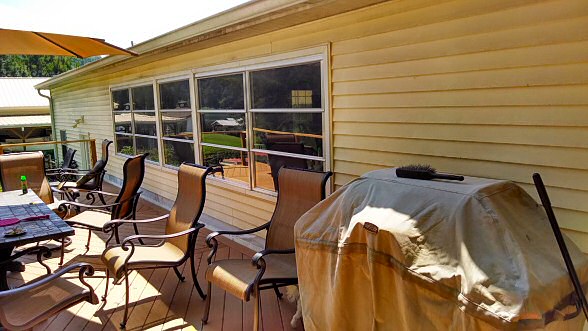
First, I removed almost all the siding from the back of the house. Then, from about 16 inches to the left of the left end of those windows, I successively removed the sheathing, the windows, all associated studs and headers, putting up temporary supports as needed, and framed in a new wall, with new lumber, new headers, and new sheathing. Window by window I completely replaced about 28 feet of the wall.
First set of old windows out, first new window in:
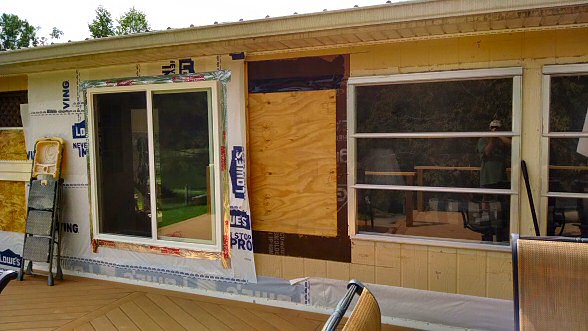
And jump to the finish:
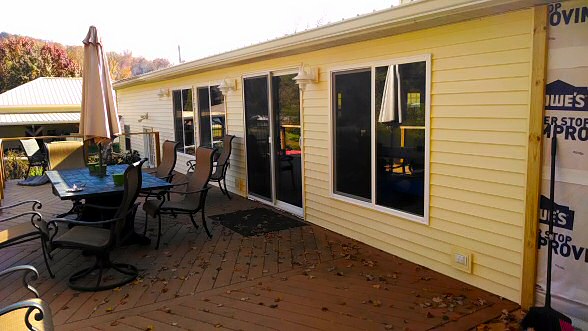
A screened-in room will go at the right end of things there.
Went from 80 square feet of glass to about 117 square feet of glass, and from the inside it is a big difference. Also, the old windows were single pane, two of them were cracked, none of them closed properly, one mechanism didn’t work at all, etc.
I had a lot of help on this job. Let see if I can remember everyone.
Gerald, kin, and crew dug a couple holes for the deck support posts, hauled the first load of lumber from Lowes to the carport, drew an almost level line on the back of the house using a broken transit, and built a couple of barge boards, I guess you call ’em, for establishing the deck level line.
Unfortunately, things didn’t work out beyond that, or the deck might have been done back in June. I filled in the holes they dug, dug 37 others on my own, re-figured the level line on the back of the house using a water level inherited from my dad, tore down the barge boards, and never looked back.
As usual, Sweet Cheeks and her trowel put all the cement down in the tubes, while I did the grunt work of loading the mixer and tipping it over. 37 holes, if I didn’t mention it before. She also helped with initial post and beam layout and installation.
Sweek Cheeks’ son Tom arrived from foreign shores, and helped put in place many of the underlying posts and beams, and ten or twelve of the first joists.
Things rambled along at my own speed with occasional assists from Sweet Cheeks, including setting the first stair stringers.
Two large self-amused fellows from Sears brought the chairs and assembled the patio table, leaving packing material blowing around the neighborhood, losing their dolly wrench in the side yard grass.
Neighbor Frank helped set the first window, and then Frank and a friend helped put the window in again after I wasn’t happy with it and took it back out.
Sweet Cheeks and I set the second window.
An admirable fellow, Rick, who I never met in person, welded the steel beam that went above the sliding door. Neighbor David gave me Rick’s number, I called him and asked if he could do such a thing, he said he would think about it, and the next day called back and said it was done. $60. I left the money in an envelope under a plant on his porch and picked up the beam from his driveway. It was perfect.
Chris L. helped install the steel beam, and the sliding glass door, which involved changing the handedness of the door.
Randy G. and Jim S. showed up to help put the beam above the third window, as Sweet Cheeks was out of town. Jim used his mad skills to align the thing to overcome previous crazy construction of room additions by multiple previous owners.
Sweet Cheeks helped set that last window. She also helped with a couple of the pieces of extra floppy siding. And speaking of siding, I used as much of the original siding as I could, including several extra pieces on hand that had been left by previous owners. The old siding, however, was put on as though there was no extra siding, all in small pieces. So, I endeavored to put it back up with as few seams as possible, and despite almost running short, got it all back up with minimum pieces. AND I hand washed every single piece, which makes it the cleanest it’s ever likely to be in the next century or so.
I hired Randy S. for a total of about twelve hours to wire numerous sockets inside and out, and to add four separate outdoor lighting circuits.
And that, I think, is that. Except for all the work still to be done.
I have about four more feet of the interior wall to insulate and cover with wall board. I’m waiting for Amazon to send a new pet door, which I’ll put through the wall. And I have to do some remedial wiring that I wasn’t quite ready to have the electrician do. Then there is the trim work, around the windows and door, and the crown molding and base boards. And the screened-in porch thing.
We were supposed to have a party in decent weather when construction was done, but I’m too slow, Winter is too early, and the hell. With any luck though, it looks like a Thanksgiving party is brewing.
July 15, 2014
Barking my pumpkins
Months in the making…
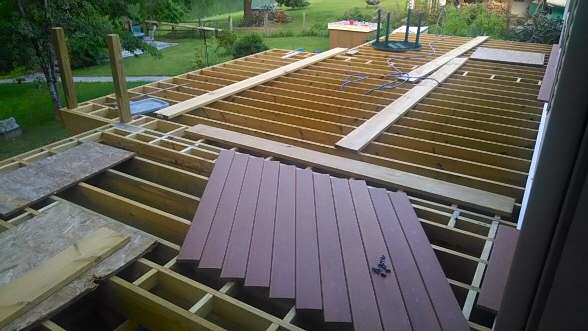
… and weeks more to go, no doubt, but it felt good (don't ask my knees) to finally be screwing deck boards to joists.
I know the decking looks a little crooked, but it's precisely 30 degrees crooked, and is supposed to be a feature. Tell me later that 30-60-90 geometry isn't a beautiful thing.
Party when it's mostly done. Mid-August. Party when it's really almost done. Mid-September.
May 21, 2014
Wrong hole
One corner of attempting to remedy the local chaos necessarily involved drill bits:
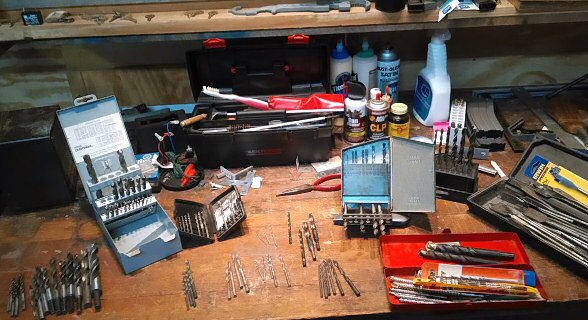
That's the larger part of them, never before sorted out, leaving out bits already thrown into the irredeemable pile, a couple dozen metal bits, and a set of brad points that I always considered special use. The pix shows loose brad points, a whole bunch of twist bits, the red box full of masonry bits, and to the far right a raft of what I call spade bits. There are even some Bullet Pilot Point bits in there.
Most of 'em in the pic, I inherited from my dad. The few bits I've bought have been of the twisty type.
The Internet tells me that, as a woodworker, I should be using the brad points for drilling cleaner, quicker holes in the sort of materials I tend to drill.
Who knew?
November 30, 2012
The heat and the light
Eight bales of R-38 insulation in the ceiling of the barn (and only about a tenth of the walls done) seems to translate into 27 degrees greater heat factor versus outside temps (28 degrees under the late full moon tonight), with a single 1500 watt heater running. (Interestingly, perhaps: All electric heaters are created almost equal. 1500 watts is 1500 watts of energy no matter how it is sliced and diced, or marketed. The downside to using fifteen 100 watt lightbulbs as a heat source is that some of the energy is wasted in produced light. Ideally, then, the best heaters are those which glow the least. Heaters with little fans incorporated to blow the heat around are likewise sacrificing some heat muscle to run the fan. Elsewise, the selection of ceramic versus oil filled radiators versus coil elements is simply a matter of preference/reliability/safety/noise/appearance kind of stuff.)
I now deem the barn to be a non-freezing environment for this latitude and longitude.
Laterally, I was previously under the impression that gasoline has no freezing point, but extensive research informs that -97 F may be a number of some reference, though it may be that gasoline only ceases to function as gasoline at that temp. The point at which it solidifies… ?
November 7, 2012
BZZZZZZZZZZZZzzzzzzZZzzzzZZZZZZzzzzz *crackle** zzZZZZZZZTTTT!
Finally powered up the barn a few weeks ago. It was more than a year ago that I buried conduit between the house and barn, but all I did then was to run a fat extension cord through the pipe, and then ran one fluorescent fixture, radio, and all the tools off that. Yeah, the light would dim when I powered the big saw, but I never blew the breaker.
So, armed with a decade old How-To wiring book, and with a few websites like here and here (electricity is pretty easy to understand with just a little study), I went in with rolls of wire, sockets, switches, lights, boxes, wire nuts, grounding screws, etc. Yadda yadda. Having never worked in electrical panels or with breakers before, it was kinda exciting.
Here's the before and after of the subpanel I branched from, though I had already run one wire in (doubling up on an existing breaker, which is probably "legal"), at the time of the before pic:
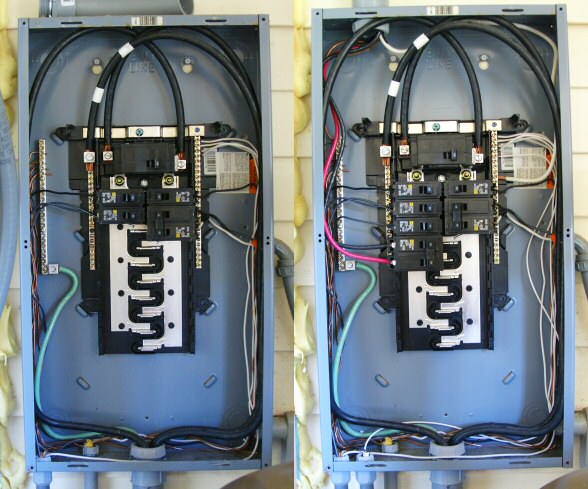
I added a 15 amp breaker for the remote barn light, and ran the main 6/3 barn feed off a 50 amper.
And here's the sub-subpanel in the barn, before and after:
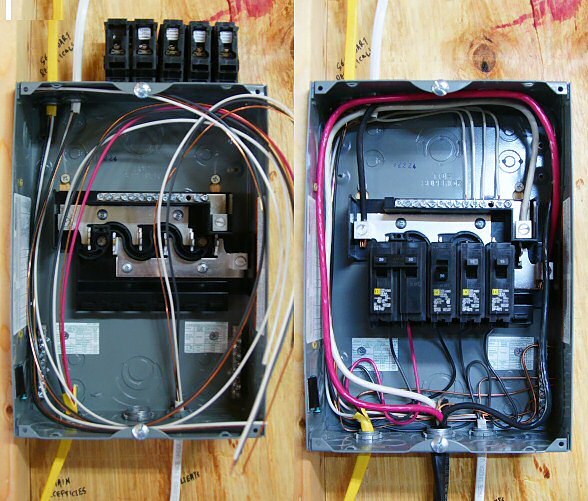
Sweet Cheeks helped me pull the 6/3 cable through the 80 feet of pipe, along with a 14/3 cable to run from a three way switch at the house to the light over the barn side door. The hardest part of hooking up the big wire was stripping the insulation off the ends. The 12/3 circuit (yellow cable, lower left) running off the double 20 breaker feeds a series of receptacles all around the inside of the barn, alternating like, to save running two sets of 12/2.
And it all works! No more over-loaded power strips and extension cords running everywhere.
And, while I was at it, I finished wiring up the front porch, a project left unfinished for a year and a half, and added a couple receptacles in the carport, too.
October 24, 2012
Travails and the redemption of cutlery
There I was, working on the third to last of eight pieces of vinyl siding to be installed on the barn, atop the side roofs where it was too hot to work in the summer, when my siding entrenchment tool broke in pieces. Argh. I have to admit that the tool did not succumb to the stresses of the job it was designed to do, but instead gave way clamped in a vise as I pounded on it with a ball peen hammer, as I tried to massage it into a more perfect set of angles.
A small amount of muttering ensued, followed by a lengthy survey of other workshop accoutrements that could be pounded into useable form, to no success.
I retreated, as I often do, to a short social period with Sweet Cheeks, this time on the front porch, wherein it subsequently dawned on me: butter knife. After a short amount of ferreting, I found the drawer with, amongst other things, the antique silverware that I was saving for wind chimes, and there was precisely one butter knife in the collection. I put it in the vise and banged on it with the ball peen hammer. I clamped it in vise grips and bent it with needle nose pliers, and other pliers, and again whapped it with the hammer, whereupon I wasn't really happy with the result, and looked for another knife, but couldn't find one, but then I tried the misshapen thing and it worked a charm, as the Brits say.
By then the sun was going down, so the last two pieces of siding will be tomorrow.
Whew.
April 30, 2012
Cigarette!
Looks like I've taken 16,000 pics in a little more than four years. Here's the latest 3,000 of them…
Remember the Cardinal babies I featured on April 15th? Four days later there was squawking all over the carport which amounted to at least one of the juniors gone his own way…
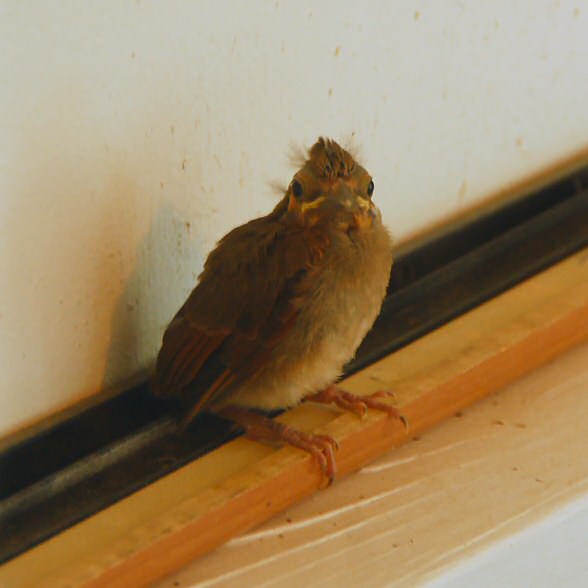
Freaking amazing how fast they grow up and leave the nest.
Here's a closeup of the little bugger, four days after being a featherless empty belly with giant eyes. Two years ago, the baby Cardinals were out of the nest so fast I thought something happened to them, so I kept better track this year. It turns out that it happens just that fast.
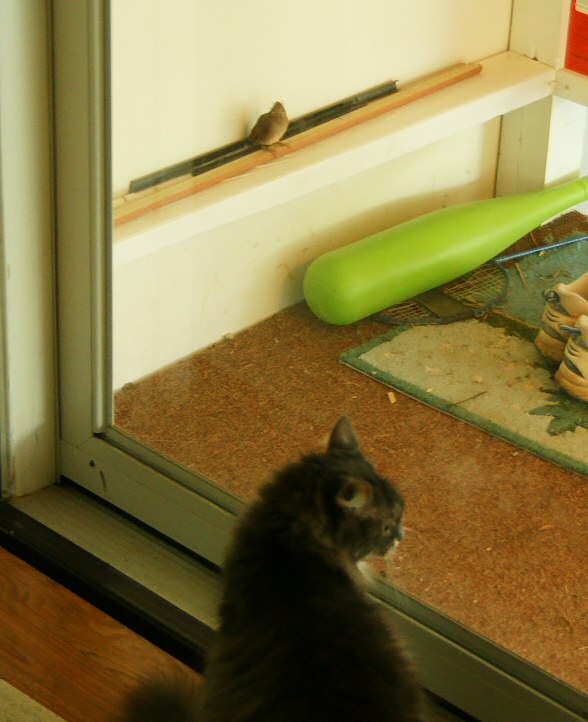
Nice start on the Mohawk. The thing was petrified with the cat(s) staring at it. As soon as I closed the inner door, it flew, which decreased the parental squawking considerably.
The next day…
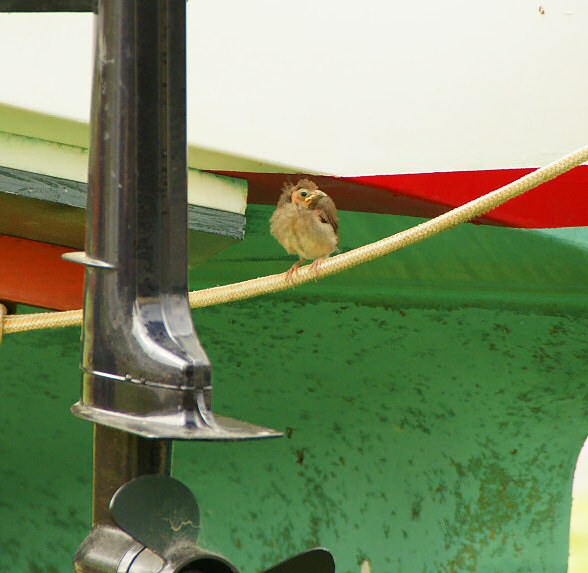
Possibly not the same bloke as above.
Eventually, both parental units made the scene.

In other news, Sweet Cheeks came back from a walk at a high rate of speed. 3.69 miles in an hour with a top speed of 5.7? Slow down, woman.

Roxanimal. I think she's faster than a Cheeta. Seriously. She's into chasing birds, now, and can pretty much keep up with them, even though they have the height advantage.

The bird in the barn. Finally. It was supposed to be there before Winter hit, but now it's there just in time to be pulled out and launched.
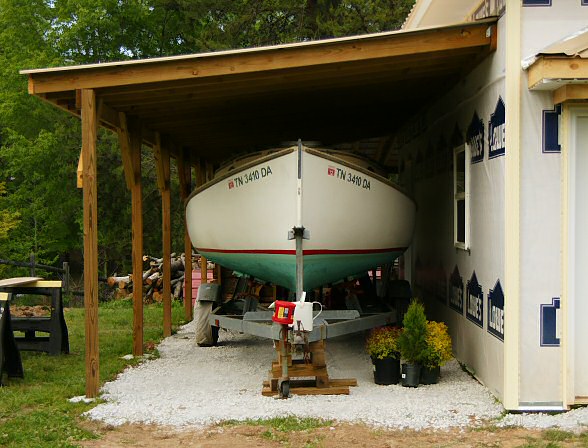
Side view. With lumber.
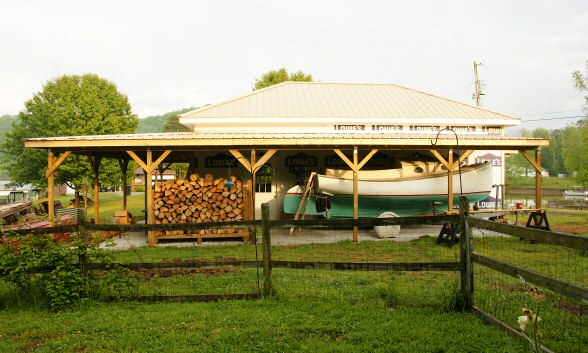
Great blue green scenery…

I performed the semi-yearly ablutions on the main boats. Those babies are in their second decade, now. How the time flies. And we had a nice five mile or so paddle in them this Sunday evening (just barely yesterday), witnessing many splendors.

Fixing up the old place. The seawall fell down years ago, before we showed up. The lot behind was caving in a little so we jammed a little rip rap in, hoping to stabilize. Knuckled under and sought and received TVA permission, even, which happened to be "free", even with an inspection by two casually dressed government employees. And rock seems relatively cheap in these hard times. I suggest you get some. Big thanks to A&B Construction for clawing up the block, and laying down the rock.
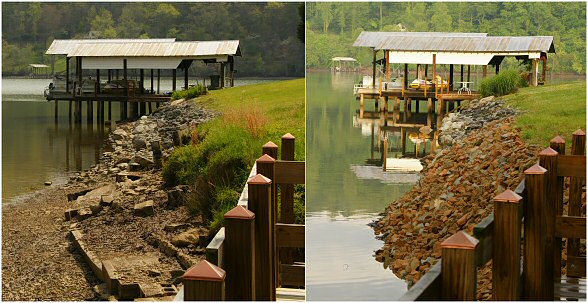
It took five tries to match the new picture to the one taken five weeks before, and I still didn't quite manage it. Position, zoom, target, hey. Close enough.
April 14, 2012
Indispensable tools
Harvey Miller's The Carpenter's Guide, online. It's all about how to build things the way they used to. Absolutely fabulous.
And, lastly but not leastly, thanks to the miracle of American Australian derring do and The Internets, a lovely Hip Roof (Imperial) rafter calculator. If you want to build a hip roof, that's almost all you need to figure it out. Other useful calculators there, too.
March 23, 2012
PixMix
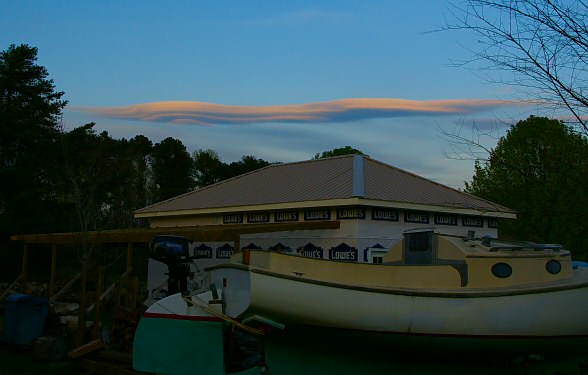


February 29, 2012
The ongoing
So, after this, we extemporized and hacked another hole further down the same wall, thusly…
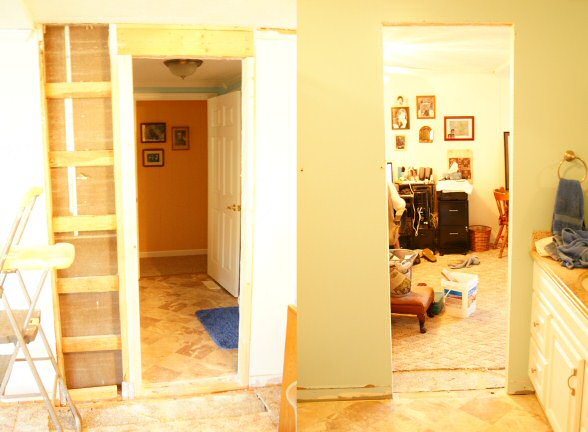
That's opposite views of the same thing, and it's our new preferred shortcut. It saves about a mile and a half trek to the bathroom or bedroom, and more importantly, facilitates an unobservable line of retreat when some lout bangs on the front door while we're in the back room in our underwear.
And, yes, the picture to the right on the brown/orange wall is my dad's West Point grad picture.
We filled the hole with a solid, narrow door, nicely trimmed and painted, now, though I haven't taken a picture. I used to forget the "before" pics, now I forget the "after" ones, as well.
All of the ripping of walls and installing of doors was just prelude to putting in a new floor in the big room that is our main interactive space. One set of things has to be done before the other set of things. It's a total remake, as the kids say. The carpet was way old, incompetently installed (I used to be a carpet layer, so I know), and sorely abused by sundry animals of previous occupants.
We started ripping the floor up near our computer stations, where there appeared to be a soft spot in the floor, and found amazing things.
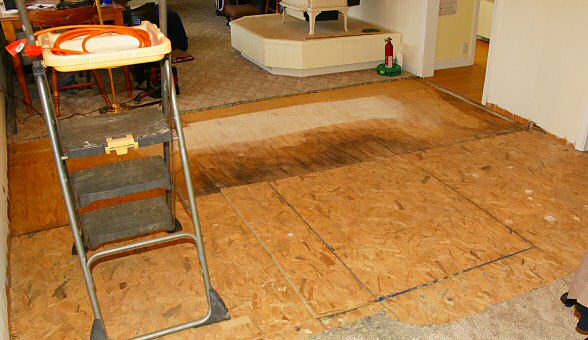
The four foot section this side of the fire extinguisher has had a layer of crumbling fiber board removed and shows fairly severe water damage on the underlying plywood. The line the other side of the step ladder was once an outside wall, and perhaps a very leaky one. Or maybe it was once an open porch?
The chipboard and still carpeted section from which the picture was taken was a later addition. Under the chipboard is nothing but rafters and insulation, ie., no sub-subfloor.
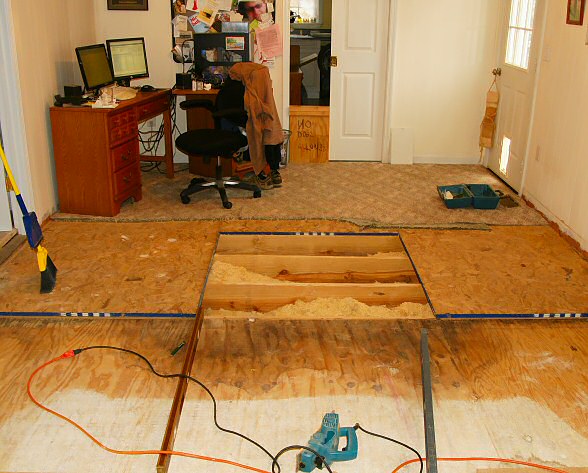
The thick carpet and padding hid a multitude of indescretions. The most recent addition, represented by the chipboard and beyond in the above shot, was not of the same thickness as the older, water damaged section, covered with an older fiberboard on it (removed, above.) Fortunately, the underlying plywood, despite showing water damage, is not completely worthless. However, I had hoped to get by with only ripping up the ten foot section above (the board under the broom and the one opposite are already "loose" and destined for the landfill, but are just keeping animals out of the danger zone) but came to the conclusion that all the fiberboards (behind the photo) have to be ripped up also, and so ordered another nine sheets of subfloor on the fly.
Further, what looks like sawdust or shavings, above, is sawdust and shavings. After the carpet was up, it became apparent that there was a rather large "hill" exactly where the two exposed joists are. Either the original carpenter didn't care, or the boards warped over time. I lean toward the former. In any event, my trusty electric planer was required to shave a solid 5/8", tapering from the middle to the walls, off those joists. The shavings are laying atop the under floor insulation, which has since collapsed into the crawl space, and will have to be shaken out and reinstalled.
A day or two later…
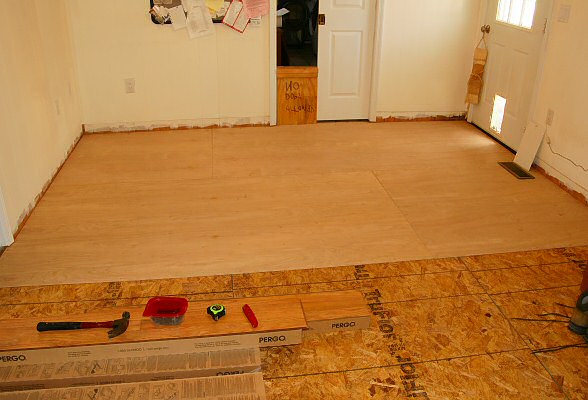
Some new subfloor, and some luan. And a day or two after that…
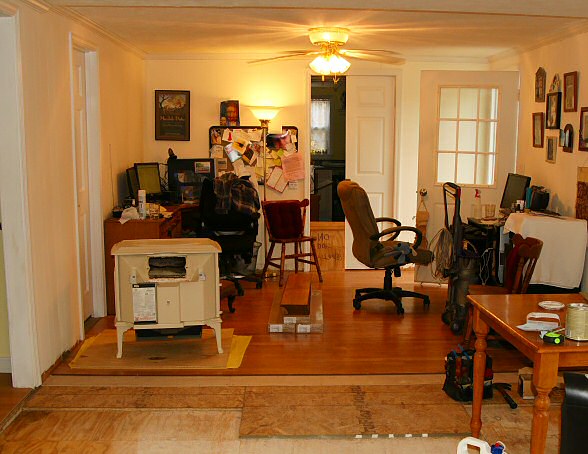
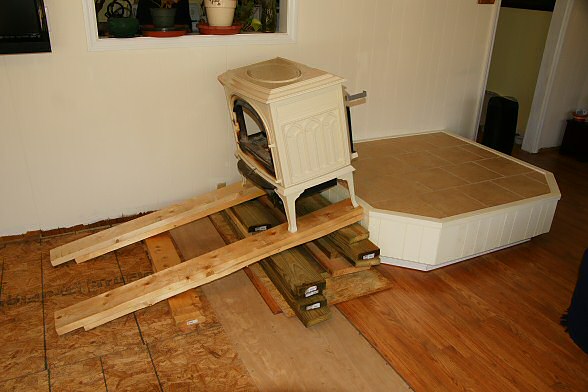
A partially reassembled back end on the new floor, with a five hundred pound wood stove paper weight.
And then, toward the other end of the room, with the carpet and old fiber board ripped away, it became apparent that, counter to the "hill" at one end of the room, there was a significant valley that had to be filled. Under the house, the joists looked solid, but where I had to plane 5/8" from the joists to the North, here I had to build up the joists just an equal amount, tapering to varying degrees.
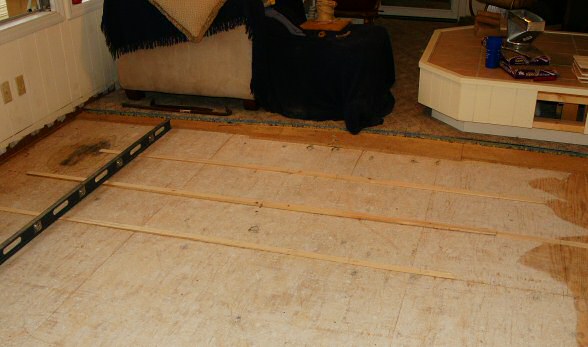
It wasn't a hard job, but it took a chunk of the afternoon. Not quite nailed down, above.
And that's the way it is, about 1:20 a.m., Leap Year Day.
January 25, 2012
Sunshine lines
Fabulous day, today, if you didn't notice. Couldn't be a better winter, really.
In and out all day, getting closer to finishing the hole, as we call it. Fixed a wiring problem, cut and installed some of the trim, nailed a piece of molding in a corner, went to the dump!, while Sweet Cheeks painted rooms and halls and ran to town and to the hills, etc.
Somewhere in there, it occured that the sun was just right for taking pictures of the ongoing barn installation…
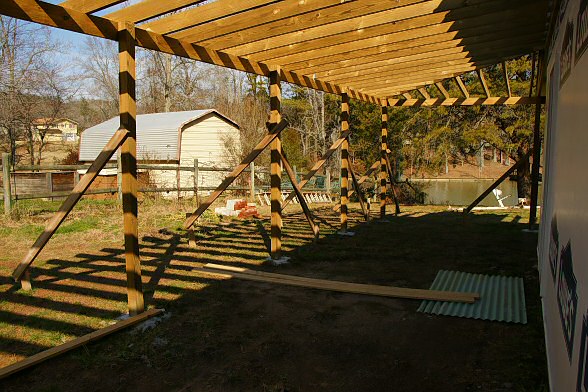
It's like a row of barber poles!
I'm fairly proud of the work, which I much enjoyed. There's 97 rafters (common, hip, jack) around three sides of the barn, and I cut, hoisted, and nailed every single one of them in on my own.
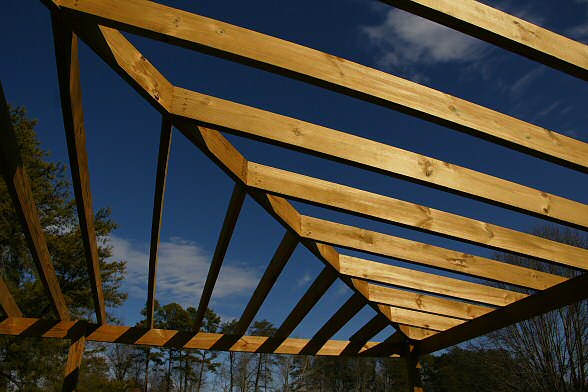
The rafters have been waiting for battens and roof panels since Christmas, but they can wait a little more. Can't do everything all at once. And it's Winter, for god's sake.
Besides, "Slow and steady", I always say, and if sometimes I falter at the latter, I never give short shrift to the former.
But, man, look at that sky. About sixty degrees today. Fish jumping. Birds canoodling. Otherwise as quiet and peaceful as anyone could wish. No motor boats this time of year. And precious little car noise out here in the great wherever.
January 10, 2012
The hole in the wall gang
If you want to make your wife happy, knock a hole in the wall.
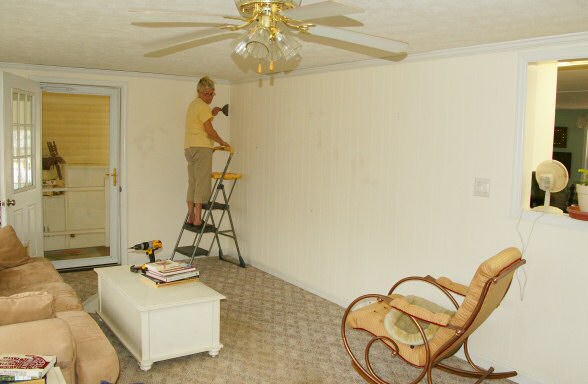
Sweet Cheeks itches to take down moldings and rip off baseboards. The long wall was actually the outside of the original house. Underneath the painted over panelling is the ancient, drab, exterior wall board, and that window into the kitchen was a regular window once.
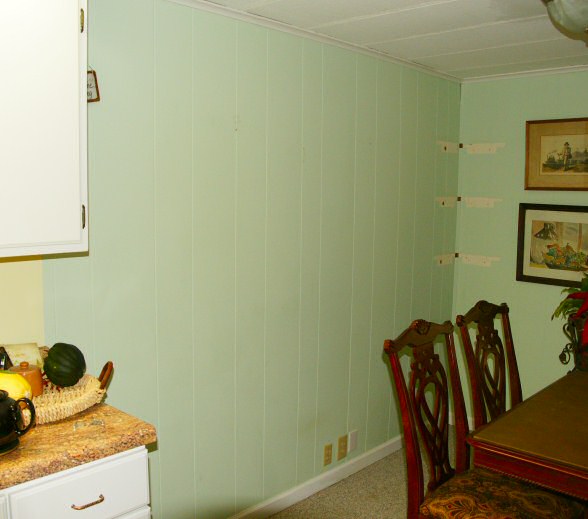
The other side of the wall. That green has got to go.
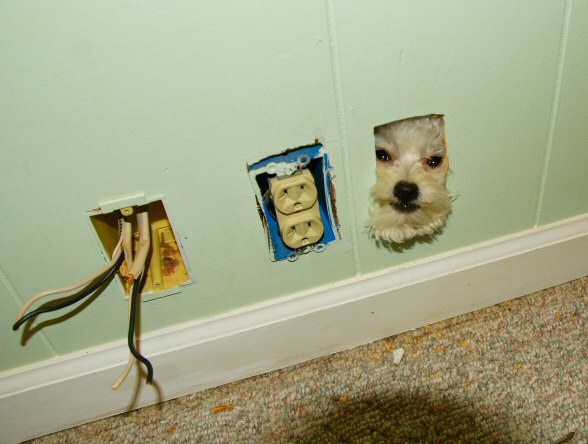
Roxie tries to break on through from the other side.
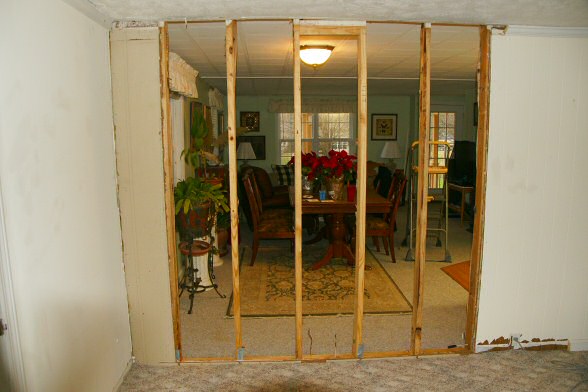
Down to the bones. After contemplation, we ripped out another stud's worth to the right.
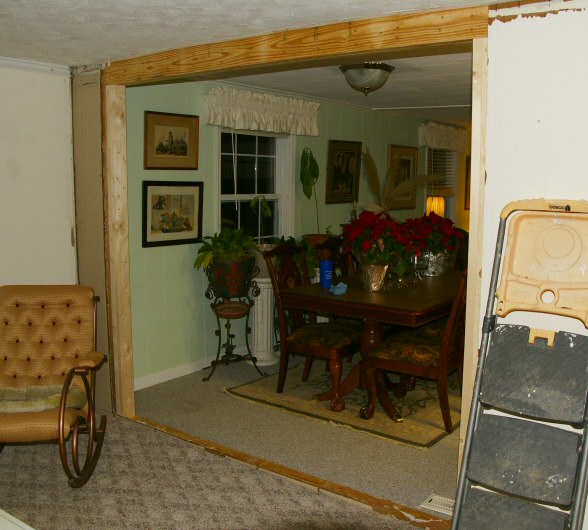
Today. We built a temporary support wall to hold up the roof, and then sawed the old studs out, jammed a 2 x 8 header arrangement up hard against the top plate, and screwed two new studs under it on each end.
Still a lot to do to make it look pretty, along with wiring some new sockets, etc.
But, man, Sweet Cheeks is pleased as punch. Just opens everything up to light and air. It even seems that that end of the family room is warmer now (the wood stove is ten feet to the right of the step ladder), though we haven't had a real winter chill to test it, yet. And it is a very handy cut through.
October 17, 2011
Meopta Universalni Hranolovy Kriz
The package arrived nearly two months late for my birthday (Little Bro, or Ivan Brosky, is always better late than never), and what the heck was it?
An army-style, steel box with no markings, and a thick, long canvas strap. Heavy.
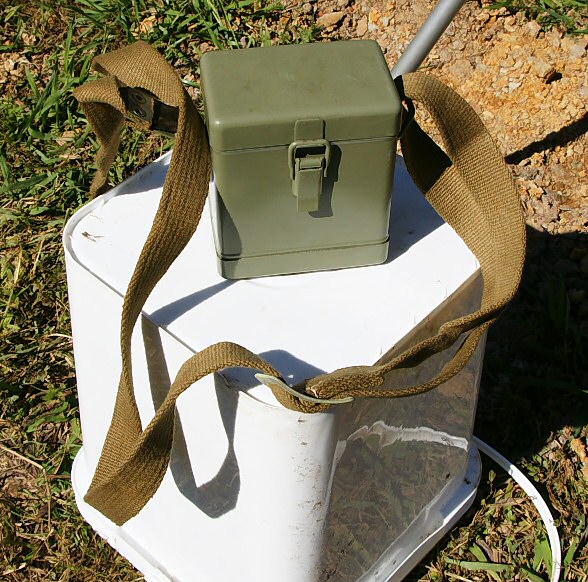
Opens to reveal two metal cylindrical objects (looking nebulously dangerous) precisely secured in a wooden form, along with a card specifying date of manufacture (30.3.56, a year and 60% after I was born) and other tid bits, a folded glossy (the fourth side blank except for a code number) info piece written entirely in Czech (or Slovak), and an ancient grease pencil/crayon with the broken tip rolling loose (the writing on the crayon is in English, so it may not be original. The box originally, possibly, contained two crayons).
I pulled the cylinder with the string out first, and it was plainly a plumb bob with plumb line (and sort of a carder (I think that's what it's called) which I must copy for my other bob lines). The larger cylinder turned out to be a complicated affair, with a hook on the bottom for the plumb line, a gimbal to allow a certain amount of rotation in establishing a vertical line, and windows at 90 degrees into the cylinder revealing a set of stacked prisms, variously etched with verticals and horizontals. Everything except the crayon in excellent condition. One face of one prism may be smudged. After almost sixty years.
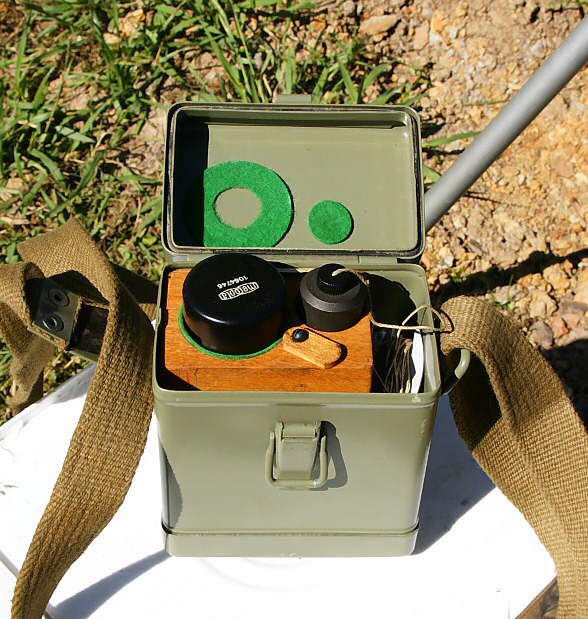
Much attempted research ensued. There turned out to be exactly one clue on the Internet, seemingly an eBay thing, with the price obscured.
Intriguingly , the web site from which the gift was sent contained no reference to the item, nor to the other two unrelated items in the same birthday box.
Anyway, using Google Translate, Universalni Hranolovy Kriz translates as Universal Prismatic Cross, or something similar. It's a leveling device, or a sort of transit, for establishing elevations, and, in modern terms, a primitive one, though it is still a precision instrument.
It took me half a morning to first, track down all my various tripods, looking for the oldest one (which might also be from the fifties) and then to try to dismantle it to a useful state. I could NOT manage to remove the thin little ring clamp holding the thumb screw to the face of the tripod table, but did finally ascertain that it accepted a 1/4 inch 20 thread bolt, and so was able (with a one inch spade to drill the hole to accept the gimbal) to rig the set up below.
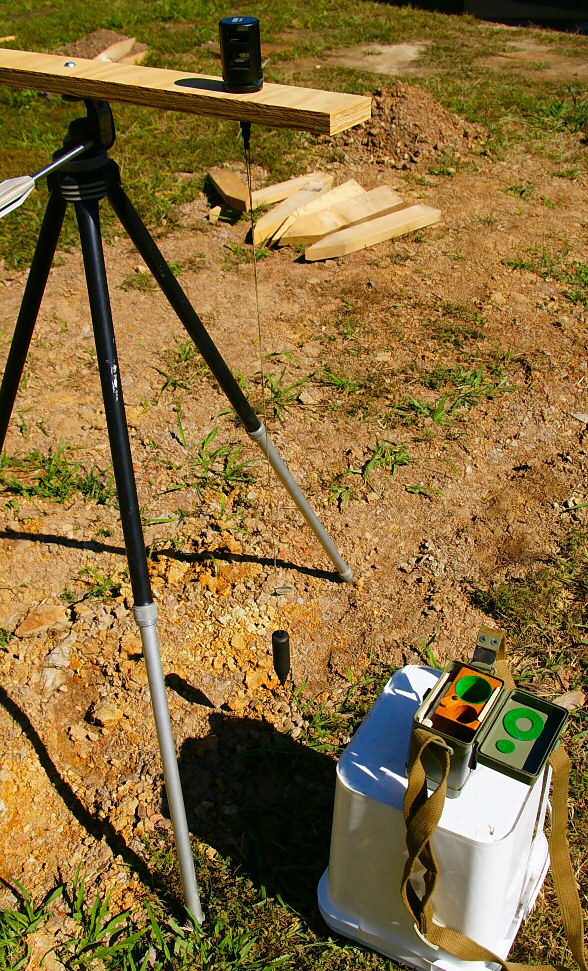
Looking into the main window gives three views. Or four, since one is split in two, though I don't yet understand all aspects of it.
The four components may be seen below. From the perspective of the camera, the top and third rectangles look ninety degrees left. I don't yet quite understand the utility in trying to find two elevations exactly 180 degrees from the Hranolovy, especially as the left hand split images do not include the horizontal hatch mark which is the distinguishing feature of the right hand view. The second rectangle looks ninety degrees right, and, in the picture, points directly at the north west corner of my barn, and shows (blurred in the photo, which suffers from lack of multiple focuses) the vertical and horizontal etch marks, with which to line up one's eyeball. The bottom rectangle is just an unobstructed straight shot through, and shows the compost bin seen outside the prism housing. The instructions seem to tout the straight through shot, but I don't understand why, as the view there is over a relatively wide angle, ie., not precise, at all.
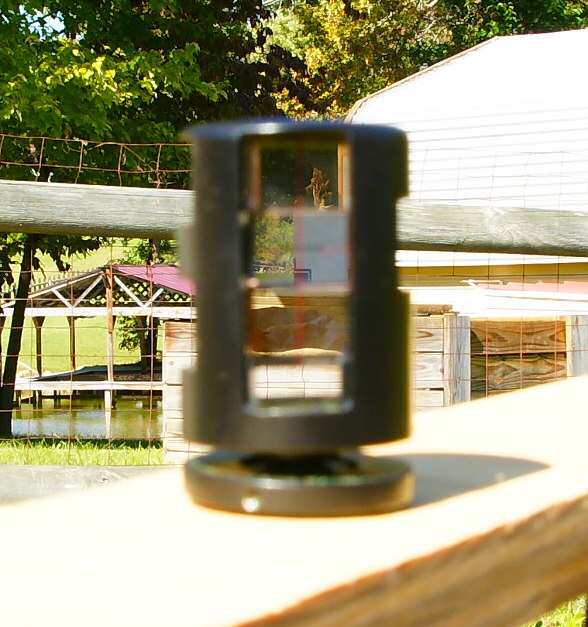
So! I took this thing, with the tripod setup, and put it twenty feet out from the mid point of the West wall of the barn. It was challenging through the the whole test, because the wind was blowing, moving the plumb bob around, swinging the prism housing to and fro. I had to estimate readings. First, I pointed the cross hatch rectangle at the right front (South West) corner of the barn, and through trial and error, kept marking spots on the housewrap until I thought the cross hairs were right on.
Then I rotated the prism housing, without moving the tripod, etc., until the same window pointed at the North West corner of the barn (above), and drew my marks, again by trial and error. The wind was blowing. I guestimated as best I could. And settled on a mark.
I then measured up from the bottom of the plywood sheathing (which was originally installed according to the concrete base, which was pretty much level), to the two marks I'd established with the Universalni Hranolovy Kriz. I was a little more than astounded when the measurement came up with a variance that I couldn't detect. I mean, it was perfect. With the wind blowing.
Compared to modern devices, it is slow and suspect. But I like it.
Thanks, Bro.
September 27, 2011
Powering through the earth
Sweet Cheeks snuck up on me today as I was working on the 39 foot 7 inch utility trench to the barn…
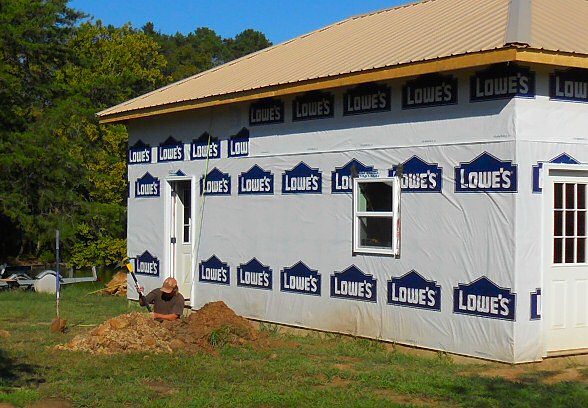
You can't tell I was sitting on the side of the trench, so it looks deep, but it only goes about two feet down. The frost line is ostensibly at around eighteen inches in these parts. Some ten feet of the trench, in about three different spots, was of a near rock like consistency, hence the pickax. I don't know what the technical term for that stuff is, but it's almost impossible to dig through with a shovel. The pickax breaks it pretty easily. The two types of dirt are visible in the piles, the darker being the ubiquitous clay-ish near dirt, and the lighter being the crumbly, layered, near rock like stuff.
Anyway, should be splicing into the water line tomorrow and running the pipe up into the barn, where it will be capped off until plumbing day somewhere in the unforeseeable future. The fat electrical wire will go higher in the same trench, tucked away in water tight conduit, which I've never worked with before, but which doesn't appear to present any extraordinary challenges.
Note the roof is on, the housewrap is as good as it gets, and the windows and doors are in, sealed and/or caulked, and, in the case of the doors, painted, alá Sweet Cheeks.
Siding and soffet should be delivered some time this week.
September 14, 2011
Working barn
I initially half-resisted the description "barn", but it's grown on me. David next door says he can give me some bales of hay to put up top.
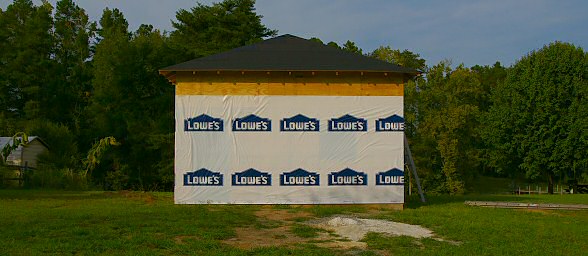
I missed photoging a couple phases, but last week I managed to get five boards on the roof by myself (with a couple of assists from Sweet Cheeks) one day, and then friend Jay showed up for two days in a row to finish three of the faces (another nineteen boards), during which time you would have seen me atop the nascent roof clinging for dear life to every likely handhold. It's a 6/12 pitch, and while it's doable it requires consideration. Tools slide off without the slightest provocation. You can stand and walk on it, but you don't want to slip.
Anyway, the worry of the height, the approach of the rainy season, some technical considerations, and Sweet Cheeks' pleas and entreaties convinced me to approach local do-everything guy Charlie Linebarger, and on short notice he and his son showed up today to plywood the fourth face and to put the felt on. They knocked it out just like that.
End stats: Thirty five sheets of 19/32 on top, with almost five rolls of 30# tar paper. One and a half bags of plywood clips. A box of nails for the felt. Easily another 2500 nails in the roof and upper wall sheathing.
Meanwhile, today I finished sheathing the walls, and then Sweet Cheeks helped with the first layer of the Lowe's house wrap vapor barrier. I ran out of staples and energy before we made it to the top, but will acquire more of both tomorrow.
Weather permitting, tomorrow Charlie & Co. will start putting the metal roof on.
This evening, we began moving stuff out of the craport into the barn. We may have to quit calling it a craport soon.